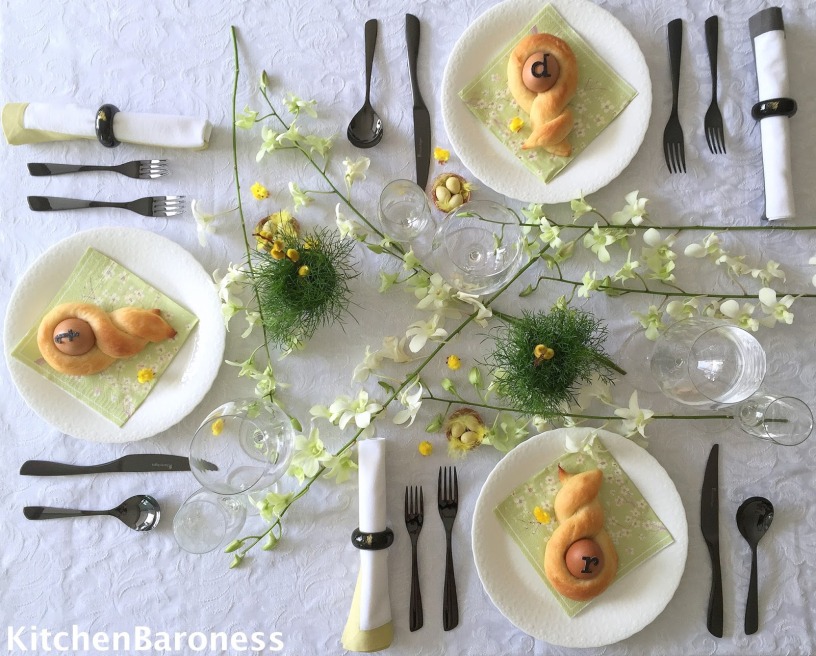
These buttery rolls also serve as ‘place cards’. Personalised them by affixing the initials of your guests. Initially, I wanted the rolls to look like the head of bunnies with pointy ears but then decided that these tear drop shapes would match better with my more subtle yet graceful table setting for this Easter.

The fun ‘pointy bunny ears’ bread rolls would be better suited for a cheery colourful table setting, complete with dyed eggs in an assortment of merry colours. Well, maybe next year. This year I will go with understated elegance in calming whites, sage and greens. What’s your Easter table going to look like? Scroll down to ‘Tips‘ for a selection of Easter breads to consider baking and to view my Easter table from 2015.
Personalised Butter Rolls For Easter
| Prep: | 25 minutes |
| Cook: | ~ 15 minutes |
| Inactive: | First rising: Approximately 45 minutes to 1 hour or until dough almost doubles in volume.
Second rising: Approximately 30 minutes or until dough almost doubles in volume |
| Level: | Moderately easy |
| Makes: | 8 butter rolls |
| Oven Temperature: | 360F (180C) oven rack adjusted to middle shelf |
| Can recipe be doubled? | Yes. |
| Make ahead? | Dough can be made the night before and refrigerated. Baked rolls taste best fresh. |
Ingredients1 cup=250ml=8.45 US fl oz 3 and 1/2 cups (1.04 lbs)(472.5g) bread flour |

Method
1. Scald the milk. That means to bring the milk almost to the boil. Once you see tiny bubbles around the circumference, add the unsalted butter, water and remove the pot from the burner to cool before using.
2. Add the flour, salt, sugar and yeast in your mixer bowl. Set aside.
3. When the milk+butter+water mixture has cooled enough not to scramble eggs, whisk in the 1 egg. Set aside.
Using a mixer
1. Start mixer at low speed to prevent the flour from flying out of bowl and all over the kitchen counter. Work up to medium speed gradually.
2. Gradually pour in the liquid mix (it should not be at all hot, warm is fine). Let the machine run for 5 minutes on medium to medium-high speed. The mixture should look somewhat sticky and not at all dry.
3. If the mixture does not seem to be coming together to form a dough, with the machine running, add 1 Tablespoon of milk and let the machine go at it for 1 minute. Work in more water the same way if required.
4. After 5 – 10 minutes of machine kneading, the sides of the bowl should be relatively but not entirely cleaned of dough. The dough should look relatively smooth and feel slightly sticky to touch. Stop the machine, scrape down the mixer bowl with a buttered dough scraper.
5. With buttered hands, pinch off a small ball of dough. Stretch it. It should be easy to stretch. If not, it might need ~ 1 Tablespoon of milk and a little more machine kneading ~ 3 minutes. Stop the machine.
6. Again, pinch off a small ball of dough and stretch it. If you can stretch it easily to a thin membrane before it tears, the gluten has developed sufficiently. Remove the dough from the mixer bowl.
7. Divide into 8 equal pieces. I usually get ~(3.5oz)(100g) pieces. Form into a round balls. Tuck loose ends under the dough. Butter the tops to avoid them drying out. Cover and let them rise until almost double in size. Between 45 minutes to 1 hour.
8. Alternatively, refrigerate overnight in covered container.
Working dough by hand
1. Place dry ingredients on a flat working surface or in a very large bowl. Create a well in the centre of dry ingredients.
2. Pour wet ingredients gradually into the well and work it in slowly into the dry ingredients.
3. To start kneading, you have to work with pushing the dough out with the palm of your hand and pulling it back with your fingers.
4. At any point, if the dough is too dry or wet to work, you can add 1 Tablespoon of milk or flour and work it in completely before adding more milk or flour. The dough should be slightly sticky so do not over flour. Butter hands instead.You know you are doing well when you find yourself working with a smooth elastic ball and it would still be a tad sticky.
5. Divide into 8 equal round balls ~(3.5oz)(100g) pieces, tuck loose ends under the dough.Butter the tops to avoid them drying out. Cover and let them rise until almost double in size ~45 minutes to 1 hour.
6. Alternatively, refrigerate overnight in covered container.
AFTER the first rise – time to shape
1. Turn on the oven to 360F (180C) oven rack adjusted to middle rack.
2. If dough was refrigerated overnight, remove from refrigerator ~ 1 hour before you are ready to bake so that it would be easier to shape and roll.
3. Flatten a dough ball gently to get rid of the air bubbles. Roll into a log. Pinch the seams shut and tuck the ends in.
 4. To stretch the dough into a 16″ (40cm) rope, with palms on the centre of the log, roll outwards, elongating the dough as you do so. Set it aside, cover and move on to the remaining 7 balls of dough.
5. Once, you have completed rolling out the last dough ball, go back to the first dough that you worked on.
6. Have the raw eggs nearby.
7. Bring the 2 ends of the ‘rope’ together. Twist the ends so that it looks similar to what is shown below.
8. Tuck one raw egg in the hole. Do the same for the remaining 7 ‘ropes’. Cover and let it rise a second time until almost double in size ~30 minutes. It should take half the time to rise compared to before.
Baking
1. Just before baking, brush the tops of the dough with melted unsalted butter.
2. Bake on the middle rack at 360F (180C). After the first 10 minutes, turn tray and continue to bake for 5 minutes until golden brown.
3. Once out of the oven, brush with melted unsalted butter, remove from tray, cool completely on wire rack.
To personalise
Simple really.
(1) Buy alphabet stickers as I had and affix on eggs.
(2) Cut out alphabets from paper. Affix the alphabets with a little butter.
(3) Use a permanent marker (I use a food safe pen) and write names on slips of paper, affix with a smear of butter.
Tips
Easter Bread Suggestions & My Easter Table From 2015
1. Easter Bread Suggestions
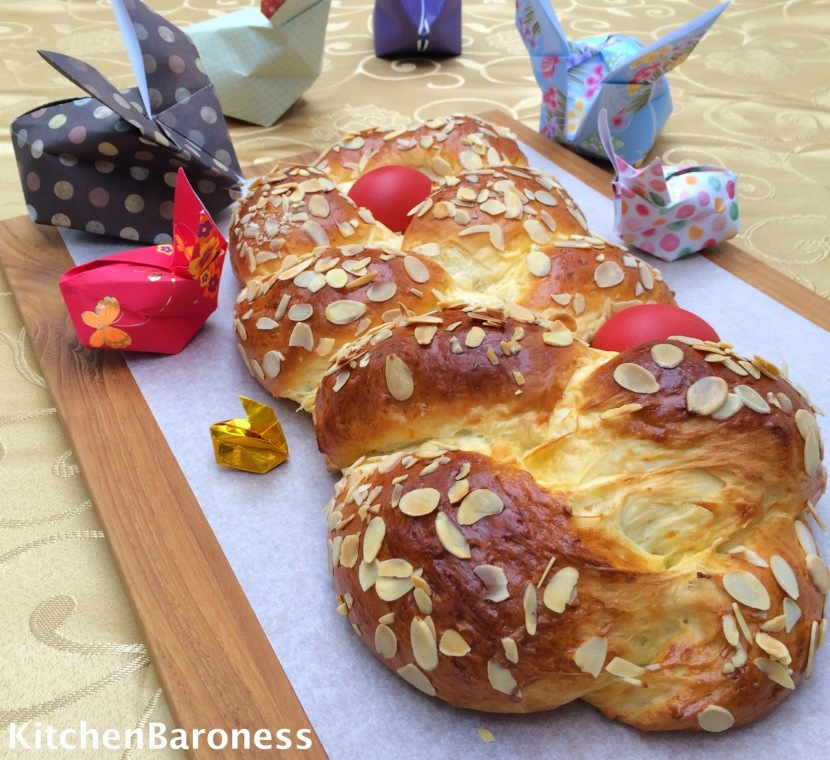
(1) Greek Easter Bread, Tsoureki has the unique flavour of mastic and mahlep in it. A spice which I have to make a special order for as it’s not readily available. This bread pulls apart almost like cotton candy. No mastic or mahlep? Substitute with anise extract.
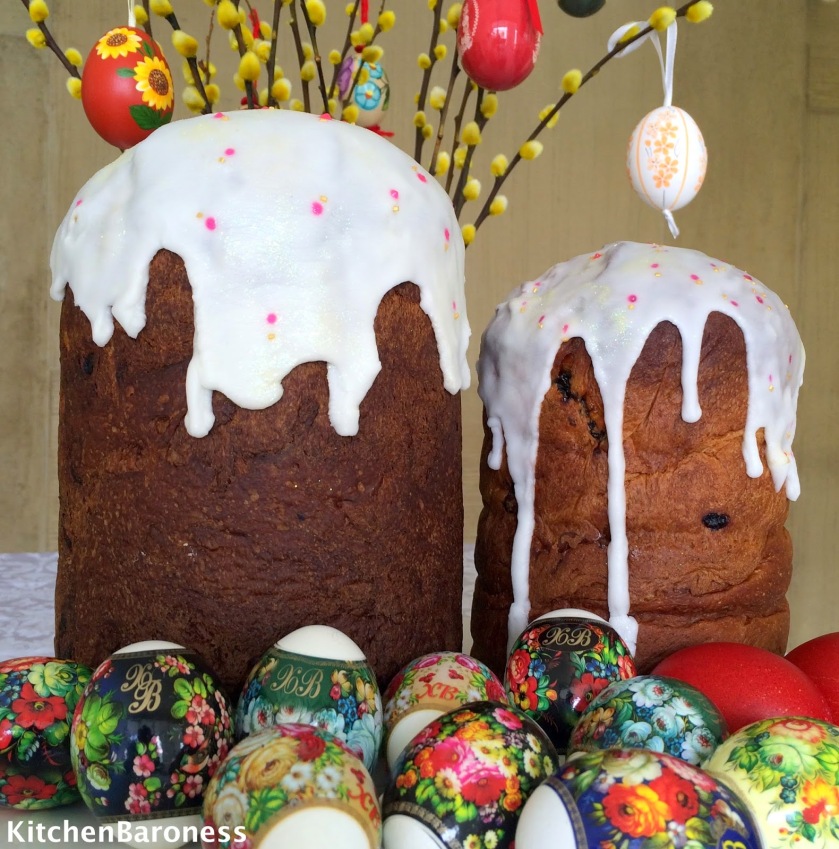
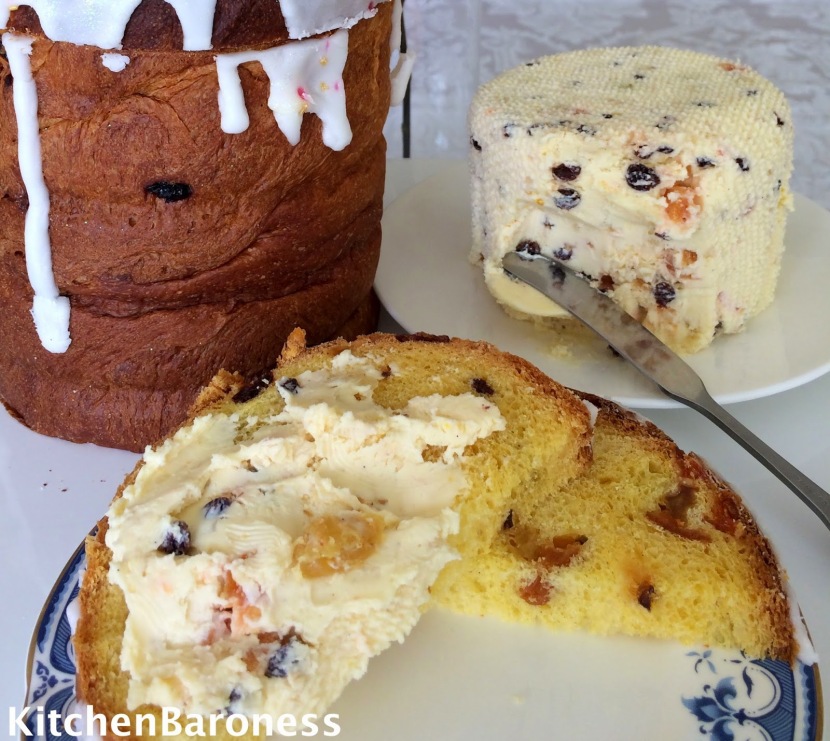
(2) Russian Easter bread, Kulich with it’s cream cheese like accompaniment, Pashka is also wonderful to eat. I make it rather often but I simplify it by baking it in long loaves and not into tall cylindrical shapes. It is a very rich and sweet bread studded with dried tangerine peel, sultanas and nuts. Sometimes, I bake them just to make Bread and Butter Pudding!

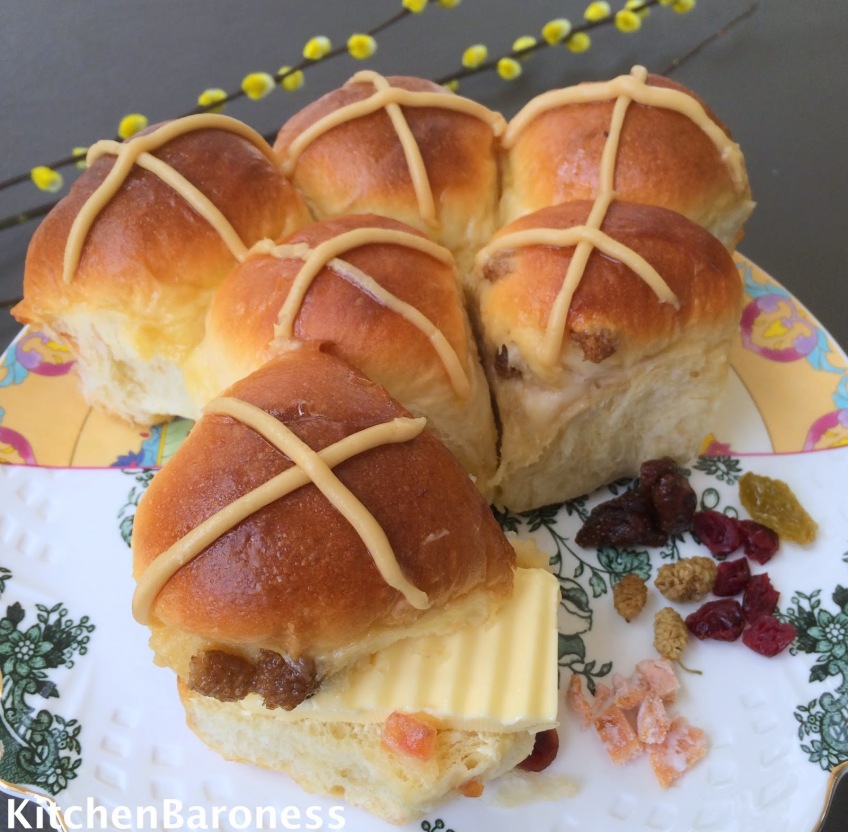
(3) Hot Cross Buns. The Easter bread that I grew up eating. Although the ones back then looked and tasted nothing like these yummy yummies.
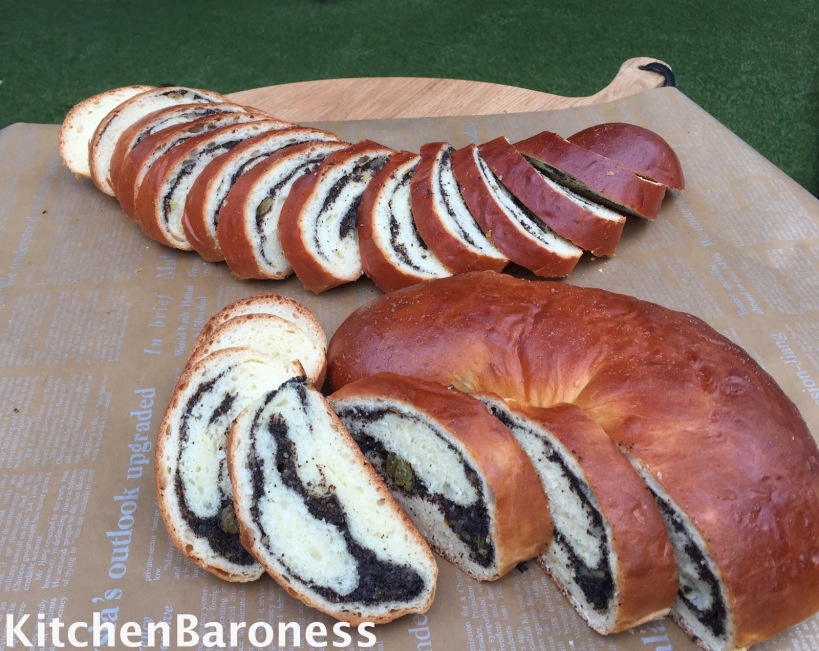
(4) Eastern European inspired Poppy Seed Roll. A celebratory bread which could be served for Easter.
(5) Round Braided Babka. The simplest Easter bread that I have baked? It would have to be this one inspired by the homemakers of Eastern Europe. No nuts or fruits but still rich and soft with egg yolks, dairy and sugar aplenty.

2. Prep your Easter Table The Night Before
(1) The night before Easter, and as with any other party, I dress my table as much as I can. Even if lunch is not ready when guests arrive, one look at the dressed table and your guests will realise the efforts you have put in for them and that they are in for a treat- no one will be too flustered even if lunch was served later than you had planned.
(2) Just remember the drinks and a few nibbles!
My Easter Table From 2015


WHAT’S COMING UP NEXT?
Now who doesn’t like Lasagne? What more if it is made with home made pasta sheets? It can only mean soft pillowy sheets of pasta.

Nice recipe in vietnam and this place is also best for spent time thanks for the blog. Restaurant near venkateshwar college
LikeLike
Thank you for your post!
LikeLike