
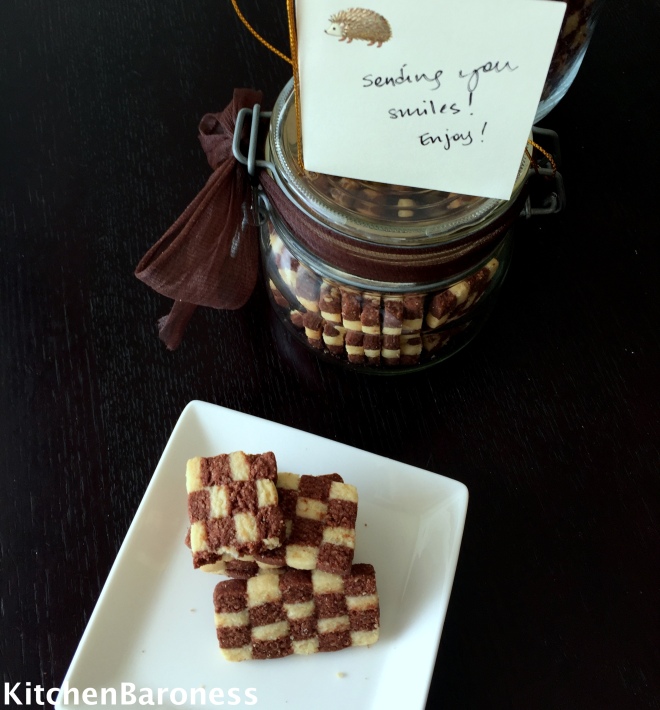
I get many requests for my Checkerboard Cookies. Why? The conventional route would be to use cocoa powder for the chocolate dough. I don’t. Instead, I use 70% minimum cocoa, bittersweet chocolate to achieve the ultimate chocolaty taste with every bite. Then, I add almonds to give the cookies an extra rich mouth feel. They are so good that I recently nibbled my way through 21 crisp cookies in one sitting!

You have probably figured out that these cookies take some time to prepare.The good news is you can triple the recipe, freeze them and bake at your leisure.
Checkerboard Cookies
|
Prep: |
~30 minutes for dough; ~30 minutes to assemble and cut dough |
|
Cook: |
~10 – 12 minutes per tray |
|
Inactive: |
~4 hours or more for dough to firm up in refrigerator. ~30 minutes X 5 to refrigerate and firm up dough at various stages of assembly. |
|
Level: |
Dough is easy. Assembling dough into checkerboard pattern can be challenging. Follow my recipe and tips and you will be fine. |
|
Makes: |
101 Checkerboard Cookies, 63 random, odd shaped ones. |
|
Oven Temperature: |
350F (175C) Oven rack -lower middle shelf |
|
Can recipe be doubled? |
Yes |
|
Make ahead? |
Baked cookies keep well up to 10 days. Just be sure cookies are baked through until crisp. These are not meant to be soft cookies. Assembled dough logs can be wrapped in individual parchment papers, kept in a sealed container, frozen up to 2 months. Thaw in refrigerator before slicing. Bake as per instructions. |
Ingredients1 cup=250ml=8.45US fl oz For creaming Chocolate * I use Valrhona -Guanaja 70% cocoa minimum, pure cocoa butter or Scharffenberger 70% bittersweet chocolate bar. Almonds (in 2 quantities) Dry ingredients * Omit if using salted butter For binding For brushing |
Method
Please note that the instructions for this recipe is wordy. There are quite a few assembly steps involved. You do not want to go crazy wondering what you have to do next. Once you bake these a few times, you would no longer need to refer so closely to the instructions.
Melting chocolate using microwave
1. In medium-size bowl, break chocolate into smaller pieces. If you are using those small chocolate buttons, reduce microwave time.
2. Melt at medium-hi for ~1 – 2 minutes. The chocolate will not be completely melted at this point. Stir briefly.
3. Microwave another ~1 – 2 minutes – the goal is not to completely melt them in the microwave but to melt enough so that any remaining chunks can melt in the residual heat from the already melted chocolate. Why? Overheated chocolate risks being turned into a grainy mess which will make them inedible .
Melting chocolate over the stove
1. Have a pot and a heatproof bowl ready. The bowl should fit into the pot snugly and sit ~2 and 1/2″ (6cm) off the base of the pot. Fill with ~1 and a 1/2″(4cm) water. The bowl should not touch the water.
2. Bring water to a simmer.
3. Add broken up chocolate into the bowl. Stir to help chocolate melt. When almost all of the chocolate has melted, remove bowl from pot.
4. Stir to melt remaining chocolate pieces. I do not leave the chocolate to melt completely over the stove as it might overheat and turn into a grainy mess.
5. Cool.
Mix dry ingredients
1. Sift flour, baking powder and salt. Set aside.
Cream softened butter and sugar
1. Remove butter out of refrigerator and let it soften before creaming. Do not let it get ‘melty’.
2. Using the flat beater of my KitchenAid, I beat softened butter and sugar on medium speed.
3. ~2 minutes into beating, stop mixer and give batter a quick stir to ensure even mixing. Scrape the bottom of bowl too.
4. Continue mixing another 1 – 2 minutes. Batter should be light coloured and fluffy.
Add egg and vanilla
1. With mixer at lowest speed, add 1 egg.
2. Mix ~1.5 minutes. Stop machine, give batter a few quick stirs to ensure even mixing.
3. Re-start mixer at lowest speed, add 1.5 teaspoons vanilla extract and continue mixing on low for ~1.5 minutes.
Add flour
It should take you no longer then 2 minutes to incorporate all the flour. Any longer and you might overwork the dough and get tough cookies.
1. With mixer at low-medium speed, add heaping ~1/2 cup of flour.
2. After ~10 seconds, add the next heaping ~1/2 cup of flour and let mixer mix it for ~10 seconds.
3. Stop machine. Quickly and lightly, scrape bottom and sides of bowl to incorporate flour.
4. Repeat this process until all flour is incorporated.
Butter dough
1. Remove ~ 1.2 lb (560g) (~ 2 and 1/2 cups) of dough into a medium sized bowl.
2. Leave remaining dough in the mixer bowl. Set aside for the moment.
3. Into the dough that you just removed, mix in 3.9 oz (110g) ground almonds. Do not stir but slash through and fold almonds in. Swirl in ~1 Tablespoon beaten egg and mix in. The dough should be pliable and not dry. Add more egg if necessary.
4. Wrap dough in plastic wrap shape it into a square. This makes it easier to roll into a rectangle.
5. Refrigerate 4 hours or until it firms up.
Chocolate dough
1. Pour 6.7 oz (190g) ground almonds and cooled chocolate over the batter that’s in the mixer bowl.
2. With mixer at low-medium speed, mix for 30 seconds.
3. Stop machine and use a spatula to incorporate any remaining streaks of yellow in dough. If incorporating by hand, slash through and fold dough until evenly mixed.
4. Swirl in ~2 Tablespoons beaten egg and use machine to quickly mix it in. The dough should be pliable and not dry. Add more egg if necessary.
5. Wrap dough in plastic wrap shape it into a square.
6. Refrigerate 4 hours or until it firms up.
Prepare your work area for assembling dough
Have the following items ready:
- Rolling pin
- Ruler, preferably a long one
- 2 pieces of parchment paper, at least 14″ x 10″ (36 cm x 24 cm)
- 2 baking trays that will fit the parchment papers
- Either a knife, bench scraper or pizza wheel for cutting dough
- Plastic wrap to wrap dough scraps
Roll dough into rectangle sheets
1. Lay 1 piece of parchment paper on your work surface.
2. Remove the firmed up butter dough from the refrigerator.
3. Unwrap and place it on the parchment paper.
4. Reuse the plastic wrap that was used to wrap the butter dough and place over the dough. You will be rolling directly on the plastic wrap -prevents the dough from sticking to your rolling pin and you will not need to flour anything.
5. Roll dough into a rectangle that is slightly larger then 9 7/8″ x 6.25″ (25 cm x 16cm). The dough should be 3/8″ (1 cm) thick.
6. Transfer on to baking tray with its parchment paper and plastic wrap still on it.
Chill the dough
1. Refrigerate 30 minutes or until firm.
Repeat above 2 process for chocolate dough
Measure out and slice dough to size
1. Lift butter dough with its parchment paper and plastic wrap off the tray and onto your work surface.
2. Without removing plastic wrap, use the ruler and blunt side of knife to gently outline dough to measure 9 7/8″ x 6.25″ (25 cm x 16cm).
3. Remove plastic wrap – don’t trash it, you will reuse it.
4. Using knife/bench scraper/pizza wheel, follow the outline you have made to cut through the dough.
5. Reuse the plastic wrap to cover the dough.
6. Gather up dough scraps. Wrap in a new sheet of plastic wrap. Set aside on your work surface.
Re-chill dough
1. Return dough to the refrigerator.
2. Chill 30 minutes or until it firms up.
Repeat above 2 process for chocolate dough
Building up the checkerboard pattern Part 1
Do not be tempted to work on dough until they are completely firmed up. You do not want to be handling limp and sticky dough. It is very difficult to work with it. It will not hold its shape and you will end up with a mess and have to shove it back in the refrigerator to firm up anyway. Just make yourself a cup of tea and relax.
When butter and chocolate dough are firmed up, have the following items ready:
- Ruler, preferably a long one.
- Knife. I like to use my chopper for this as it has an even width blade and I can lift the sliced dough with it and do away with the bench scraper.
- Bench scraper
- Pastry brush
- 1 beaten egg for egg wash
- 7 pieces of parchment paper, cut at least 14″ x 12″ (36cm x 30cm)
Be careful as you slice, separate, assemble and work on the dough. The layers might shift because of the slippery egg wash.
1. Remove plastic wraps from butter and chocolate dough.
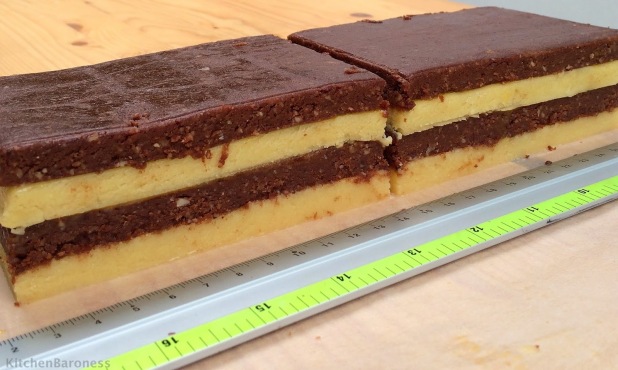
2. Lift the two dough on their parchment papers, off their trays and lay dough alongside each other on work surface. Refer to image below.

3. Brush the butter dough with egg wash.
4. Lift and set chocolate dough on the butter dough. Now you have 1 rectangle block with 2 layers: chocolate; butter (refer to image below).
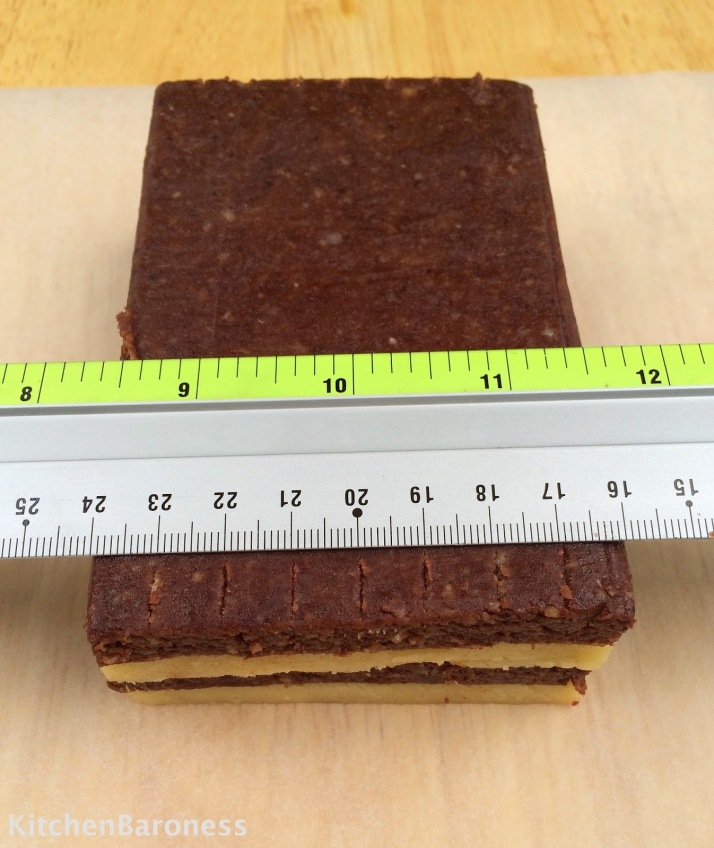
5. With a ruler along the breadth of one side of the dough, measure the midpoint. It should be 3 1/8″ (8 cm). Mark lightly with a knife. Also mark the midpoint of the breadth on the opposite end.
6. Have the ruler to line up against the 3 1/8″ (8 cm) markers you have made (refer to image below).
7. Slice the dough into two. You will get 2 rectangle blocks.

8. Brush the top of only 1 of the 2 rectangles with egg wash.
9. Use your bench scraper to help you lift the other (‘un-egg washed’) rectangle block onto the egg washed rectangle. You have now assembled 1 rectangle block with 4 layers: chocolate; butter; chocolate; butter.
10. Slice dough lengthwise into 2 shorter blocks. Refer to image below. Now you have 2 rectangle blocks.
11. Wrap blocks separately in parchment papers (no need to secure the ends), place on baking tray.
Refrigerate to firm up
1. Refrigerate 30 minutes or until firm.
Building up the checkerboard pattern Part 2
1. Remove 1 rectangle block from the refrigerator.
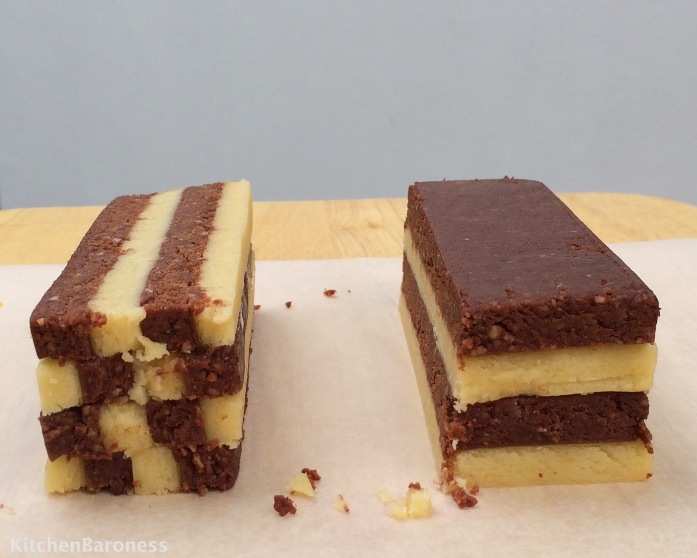
2. Using a ruler, mark 3/8″ (1 cm) intervals at the shorter end of the rectangle. Refer to image below.
3. With the knife, slice off the first 3/8″ (1 cm) and set on its side.
4. Brush with egg wash.

5. Slice the next 3/8″ (1cm) and lay this over the first slice, making sure that you have alternating layers of butter and chocolate slices resembling a checkerboard/chessboard (refer to image below).
6. Continue to stack until you reach 4 layers.
7. Wrap with new sheet of parchment paper, no need to secure the ends, place on baking tray.
Refrigerate to firm up
1. Refrigerate 30 minutes or until firm.
Repeat process with the remaining dough
Dough scraps
1. Remember the dough scraps collected earlier?
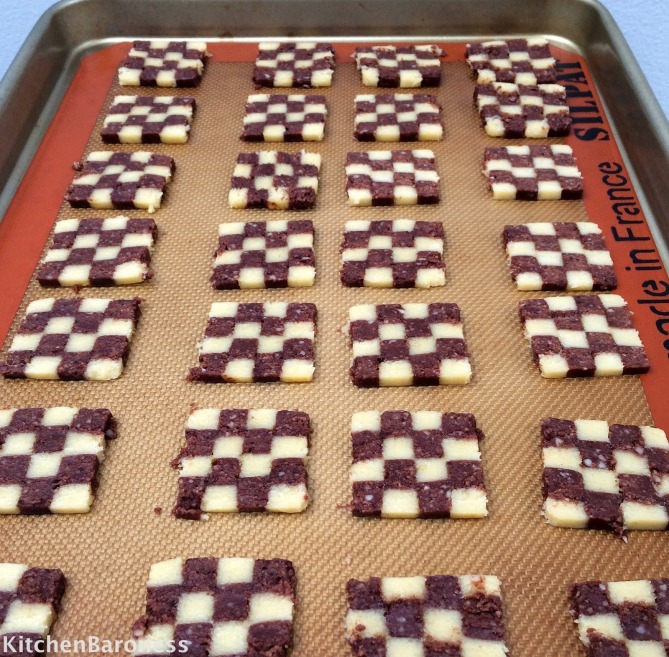
2. Use parchment paper to shape scraps into log. This log would inevitably end up with a marbled look and be oval in shaped when sliced. Refer to image below (left of image).

3. Chill dough until thoroughly firmed up before slicing.
Baking
1. Turn on the oven to 350F (175C). Oven rack adjusted to lower middle position so that cookies do not brown too quickly.
2. Slice dough logs into 1/8″ (0.3cm) slices.
3. Space them ~1/2″ (1.25cm) apart on lightly greased tray or parchment paper or silicon mat lined baking tray.
4. Bake 12 ~ 15 minutes, rotating the tray mid-bake. Watch the cookies as they can brown very quickly. You want to take them out when they are very slightly browned. You do not want them golden brown as you want to try and keep the pale butter colour.
5. Once baked, allow cookies to cool for 5 minutes on baking trays. They are fragile while hot.
6. Cool completely on cooling racks before storing in airtight containers.
Tips
(1) Work on this recipe over a weekend. If you rush through it, you are likely to get frazzled and the whole enjoyment of baking these pretty cookies will be lost. I usually spread the work out over 2 to 3 days.
(2) If your dough gets too dry after adding almonds, work in a little beaten egg. Humidity in your area can play a part in how the dough turns out.
(3) If your dough feels too sticky, add a little more almonds.
(4) Do what I do when I just want to eat these cookies and cannot be bothered to assemble them. Simply roll the butter and chocolate dough separately into rough logs. Then wedge them together and roll into a single log. Wrap in plastic wrap, refrigerate until firm before slicing. You will get half moons of butter and chocolate upon slicing them. Simpler still is to wedge the butter and chocolate dough together and roll into one log. You will get a ‘marbled’ look upon slicing them.
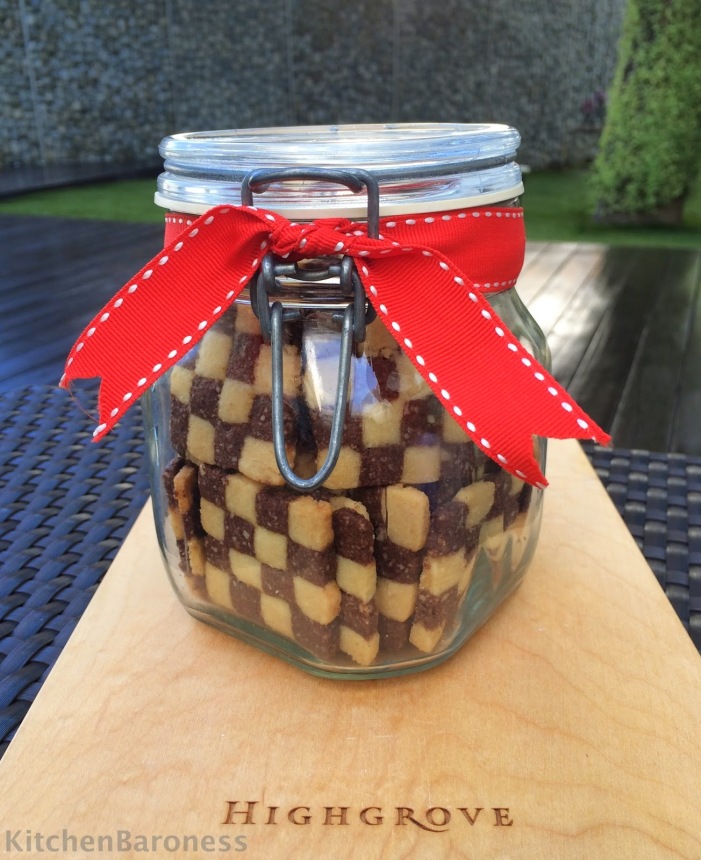
(5) These make welcome gifts especially during the festive season.
WHAT’S COMING UP NEXT?
It is time to go back to a savoury recipe. We are still on the English Afternoon Tea Menu menu. So I will be posting recipes for tea sandwiches. Looking in my refrigerator, I found smoked salmon and a beautiful roll of beef tenderloin. Suffice to say, I will be posting the recipes for Smoked Salmon With Dill Butter Tea Sandwiches and Roast Beef With Beetroot Tea Sandwiches.
Find out how I roast the beef tenderloin and keep that middle circle nice and pink. Roasting beetroot till they are as sweet as they can possible be is really simple.
I will post the recipes for Crisp Cucumber Tea Sandwiches, Egg and Cress Tea Sandwiches, Ham with Honey Butter Tea Sandwiches and the Classic Victoria Sponge Cake thereafter. I did post the Sweet Milk Scones recipe just recently. Looks like I will be enjoying another round of English Afternoon Tea soon. Time to invite a few more people around again.

Top plate: Classic Victoria Sponge Cake sandwich with strawberry jam and buttercream icing, Checkerboard Cookies, Sweet Milk Scones.
Bottom layer of sandwiches from left to right: Roast Beef with Beetroot Tea Sandwiches, Smoked Salmon with Dill Butter Tea Sandwiches, Ham with Honey Butter Tea Sandwiches.
Top layer of sandwiches from left to right: Egg and Cress Tea Sandwiches,Roast Beef with Beetroot Tea Sandwiches, Crisp Cucumber Tea Sandwiches.


They are very pretty cookies! Send some over please! Love that photo with Baron and the cookies. It is priceless.
LikeLike
I like it too!
LikeLike
This recipe works for me! Love it!
LikeLike
Thank you!
LikeLike